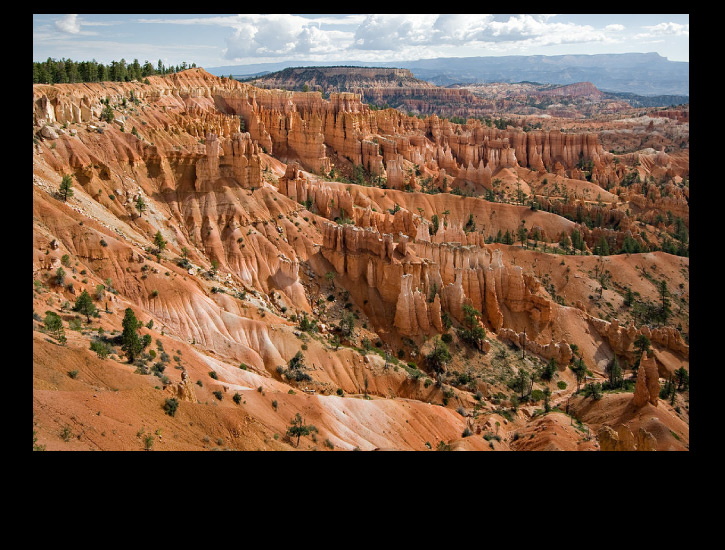
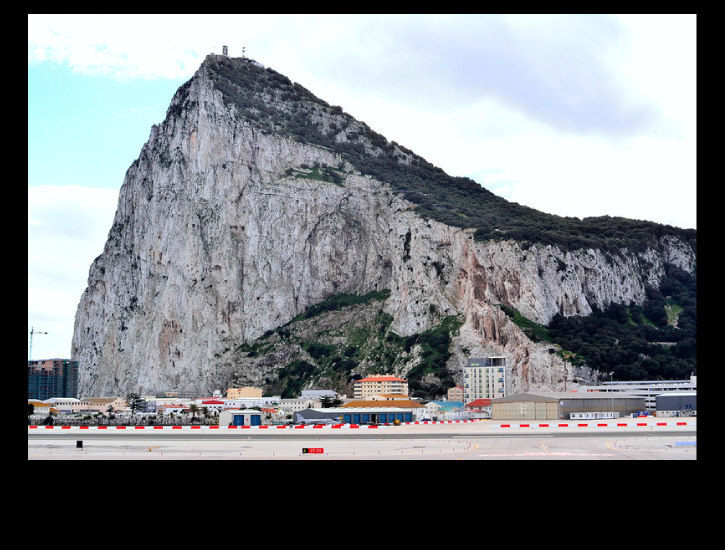
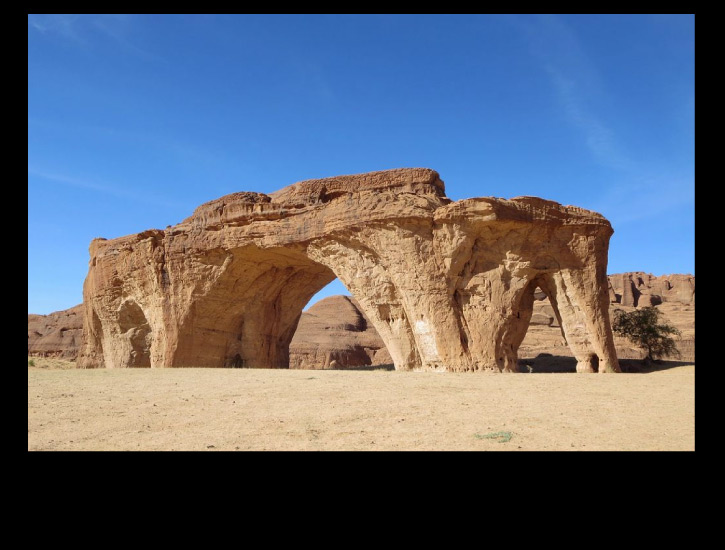
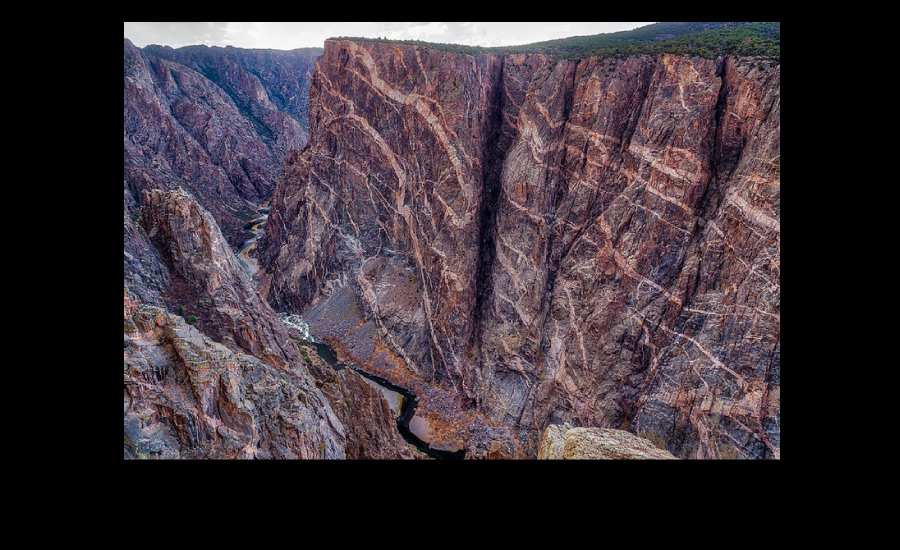
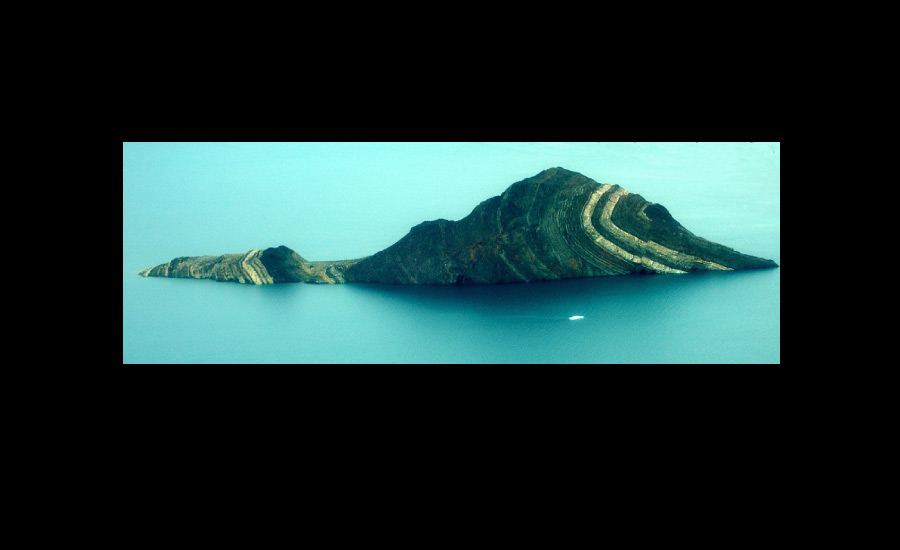
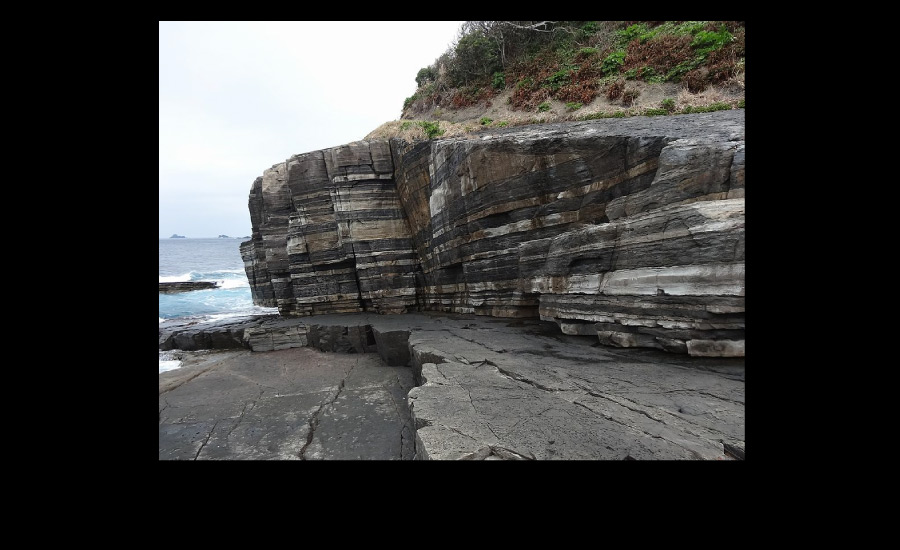
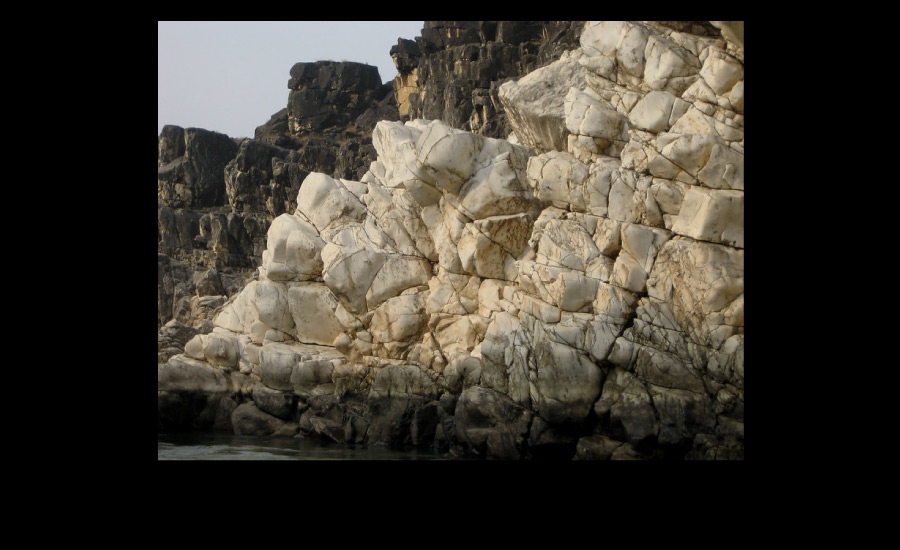
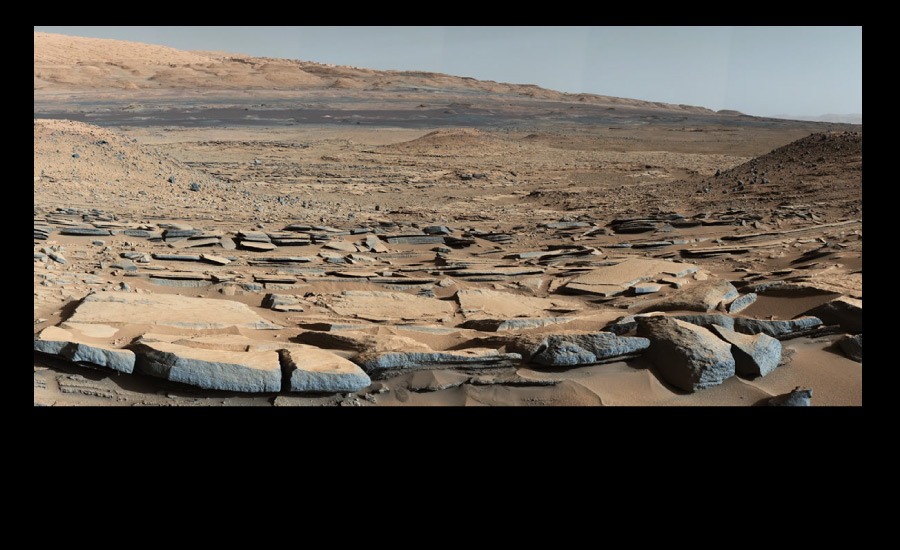
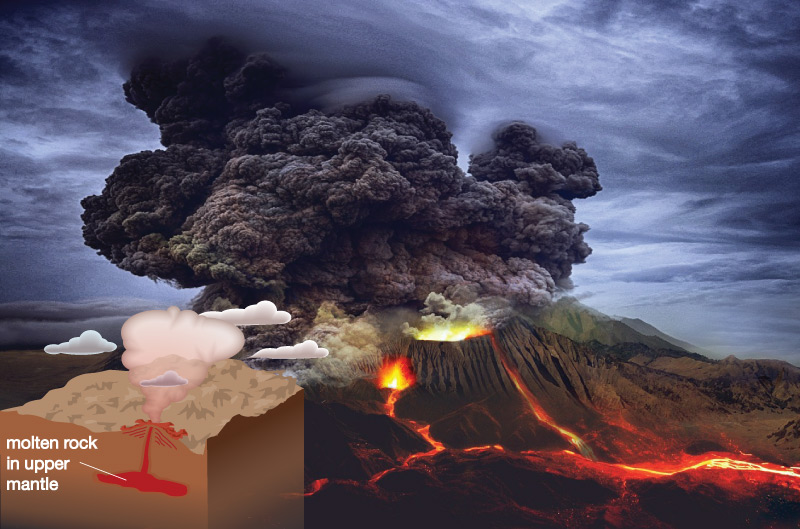
You will notice that this section is much heavier on jargon than most of the rest of this book. Part of the reason is simply that some of these terms are necessary to the discussion. In addition, however, we’ve included some terms that we don’t really think are necessary for middle schoolers, but that are explicitly used in the NGSS. We recommend that you try to stick with the more “plain language” terms to the extent possible, but if you are preparing students for NGSS-based tests, then be sure they know the meanings of all of the terms. You’ll see that we frequently repeat the definitions (within the “…” bubbles) to try to help students remember the meanings.
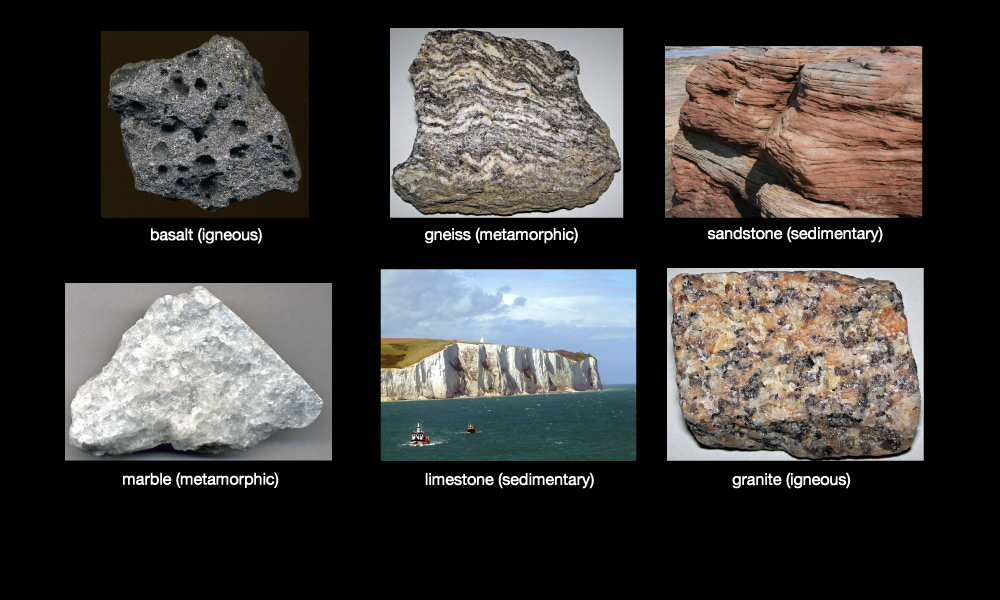
The first step in learning to read rocks is to understand their basic types and how they form. You already know the basics of the rock cycle (see Section 4.2.2), which describes how rocks can be changed between the three major types: igneous, sedimentary, and metamorphic. The diagram of the rock cycle from Chapter 4 is repeated here.
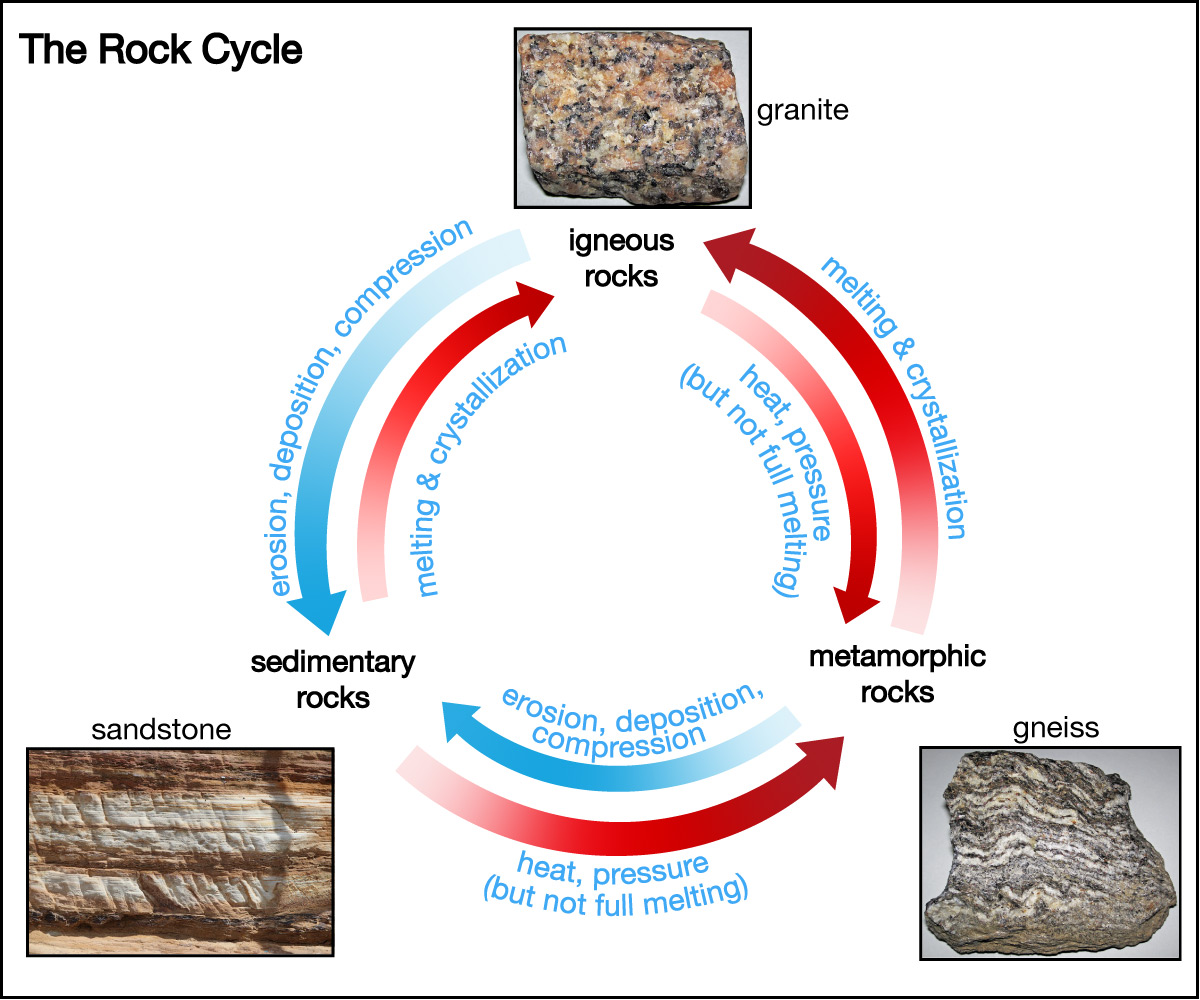
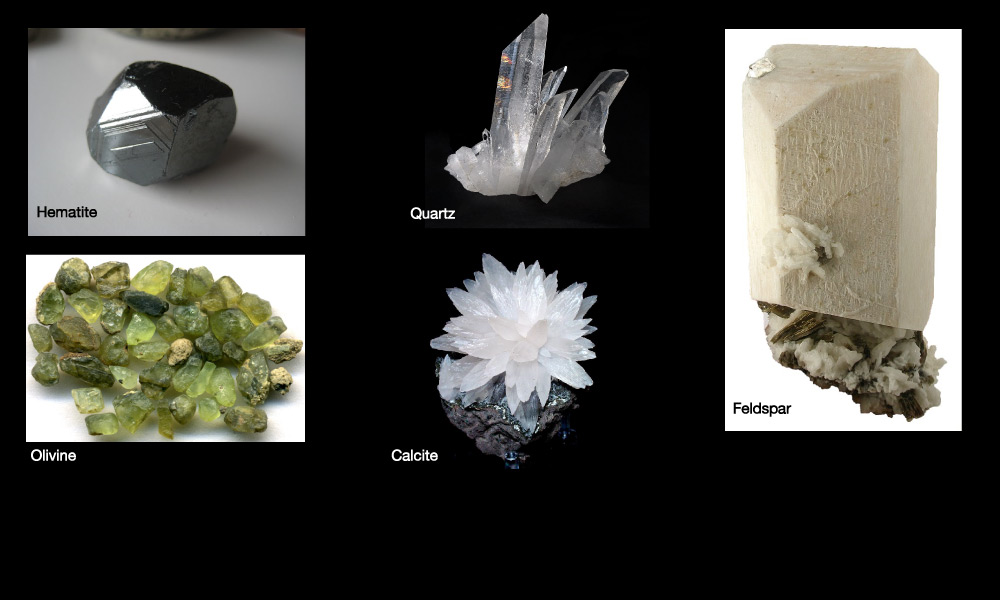
We will use the rock cycle to consider rock formation in more depth, but first we need to talk about a little more of the terminology of rocks. Let’s start with the terms “rock” and “mineral.” These terms are often used interchangeably, but in science, minerals are the building blocks of rocks. More specifically:
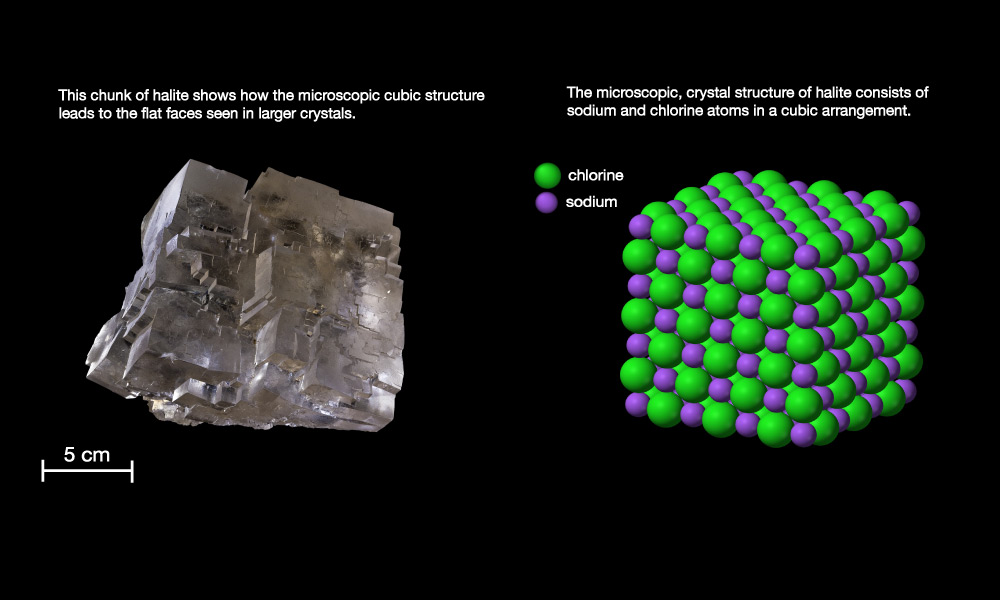
- Each different type of mineral has a distinct chemical composition, with its atoms arranged in an orderly way to give the mineral what we call its crystal structure.
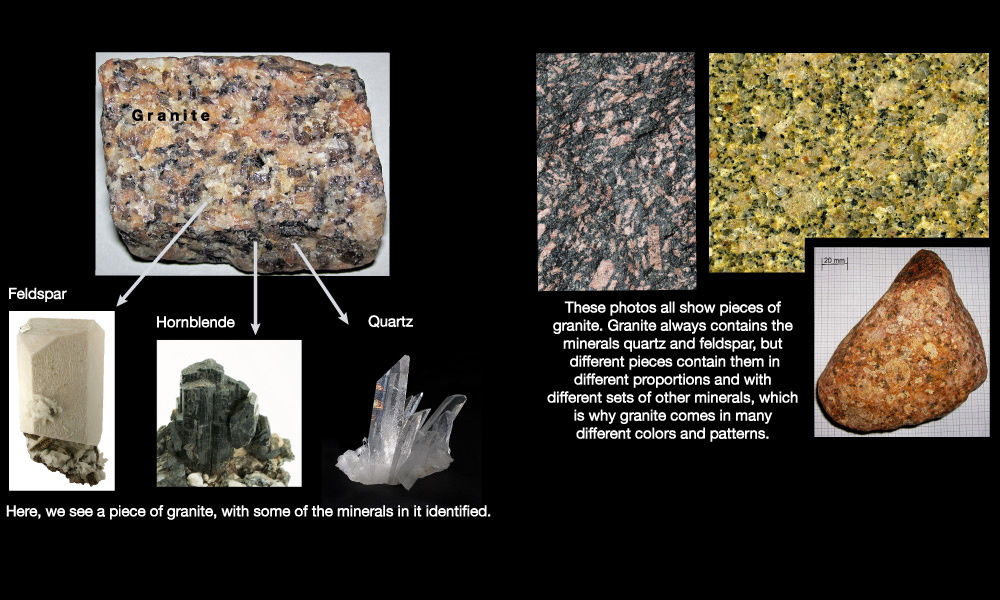
- A rock is made from minerals. Some rocks contain only a single mineral type, but most rocks are a mix of two or more different minerals that have become stuck together.
Slide show 5.1.1–2 illustrates the definitions of and differences between rocks and minerals.
Slide Show 5.1.1–2. Study these slides to be sure you understand what we mean by rocks and minerals in Earth science.
Quiz
Answer the following questions by studying Slide show 5.1.1–2.
Note: As always, after you finish the quiz, be sure you read the feedback that explains the correct answers, to make sure you understand the reasons for these answers.
Our second piece of terminology concerns how we describe the story that geologists can read from rocks. The general term for anything that preserves evidence of a past event is the word record (as a noun), which comes from a Latin term meaning “remember.” For example, your school records show your past performance in school, your medical records describe your past medical visits and treatments, and a music record (or recording) provides a way to hear a piece of music that someone performed in the past. With this in mind, geologists refer to the story that they can read from rocks and fossils as either the rock record, the fossil record, or the geological record.
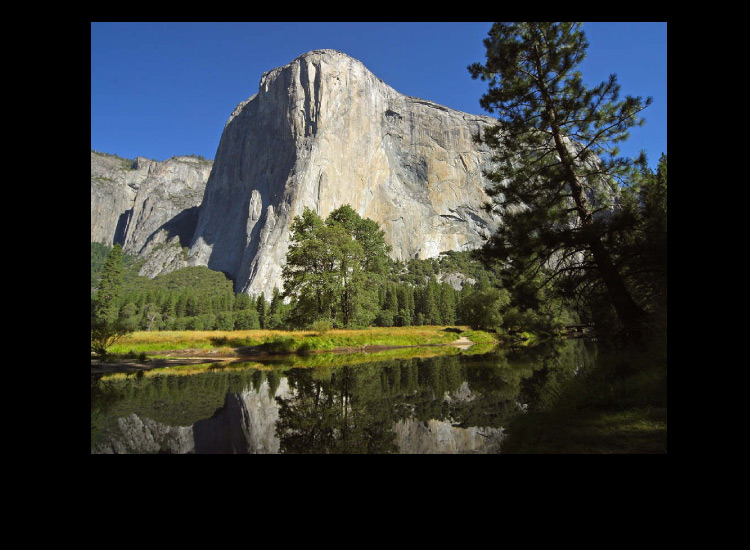
- The rock record refers to the history of our planet that can be read from individual rocks or from layers of rocks. For example, we say that the walls of the Grand Canyon contain a rock record that stretches through hundreds of millions of years of time.
- The fossil record is very similar, but refers to the information that can be read from fossils of organisms that died in the distant past.
- The geological record encompasses both the rock record and fossil record.
Note that these three terms are often used in interchangeably, which makes sense because fossils are found within rocks, and both rocks and fossils are studied in geology.
Finally, a less crucial but sometimes surprising bit of terminology concerns whether we should talk about singular “rock” or plural “rocks.” The answer is that we tend to use both forms interchangeably, but there’s a subtle distinction in how we generally use the terms:
- When we talk about singular rock, we are generally referring to rock as a type of material that is solid and made from minerals.
- When we talk about plural rocks, we are referring to sets of objects that are made of rock.
As a simple example, when we refer to the “rock layers” of the Grand Canyon, we are talking about the fact that the layers are made of the material that we call rock. When we talk about the “rocks of the Grand Canyon,” we are talking about all the individual rocks that we could find there. Note, however, that because individual rocks could in principle break off from the walls at any time, it doesn’t really matter whether we refer to the “rock” or “rocks” that make up the Grand Canyon walls. That is why the singular and plural forms are often used interchangeably.
With the above terminology in hand, you are ready to investigate the three basic rock types and their formation in a little more detail.
Journal Entry
Personal Rock Record
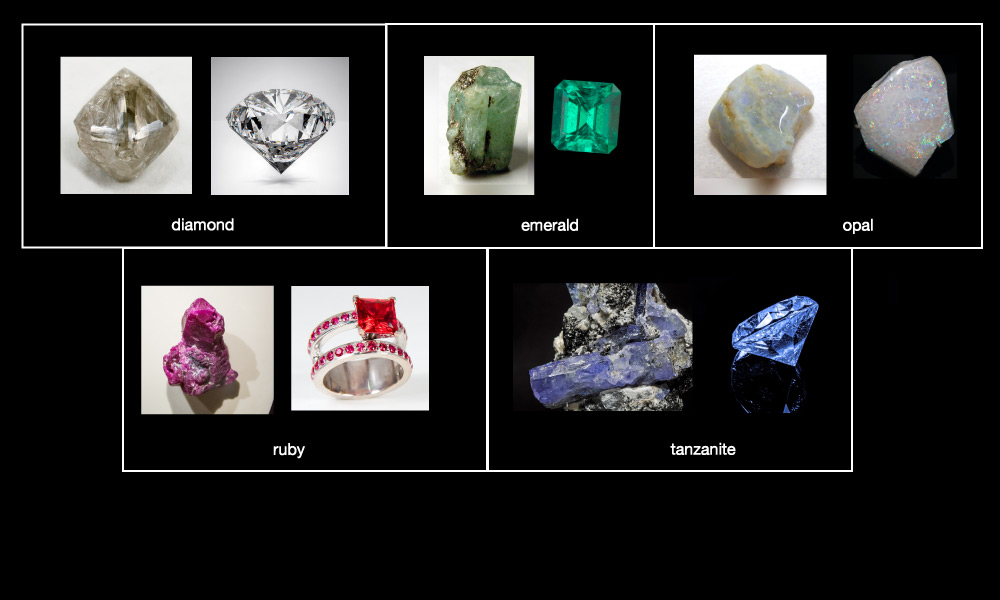
You or your family members probably have some rocks of your own. These might be gemstones in jewelry or rocks that someone collected. You might also have rock floors, rock countertops, or rock tabletops. There is probably also rock in your walls; for example, what we call “drywall” is made largely of a rock called gypsum. Each rock has a geological history, but it also has a story within your family – what we might call its personal or family “rock record.” For this journal entry, choose a rock that has some special meaning in your family. Take a picture of it, try to identify what kind of rock it is (this should be fairly easy if it is a piece of jewelry or a collector’s rock), and then write a paragraph in which you briefly describe how the rock came into your family’s possession, and what it means to you.
Bonus: Do a little research on how this type of rock forms within the Earth, and write an additional paragraph or two in which you talk about the rock’s likely history before it came into your family’s possession. Feel free to include additional photos of what this type of rock looks like when found in nature.
This short journal entry should help students realize that rocks are all around them, and can tell stories that are personal as well as geological.
Igneous Rocks
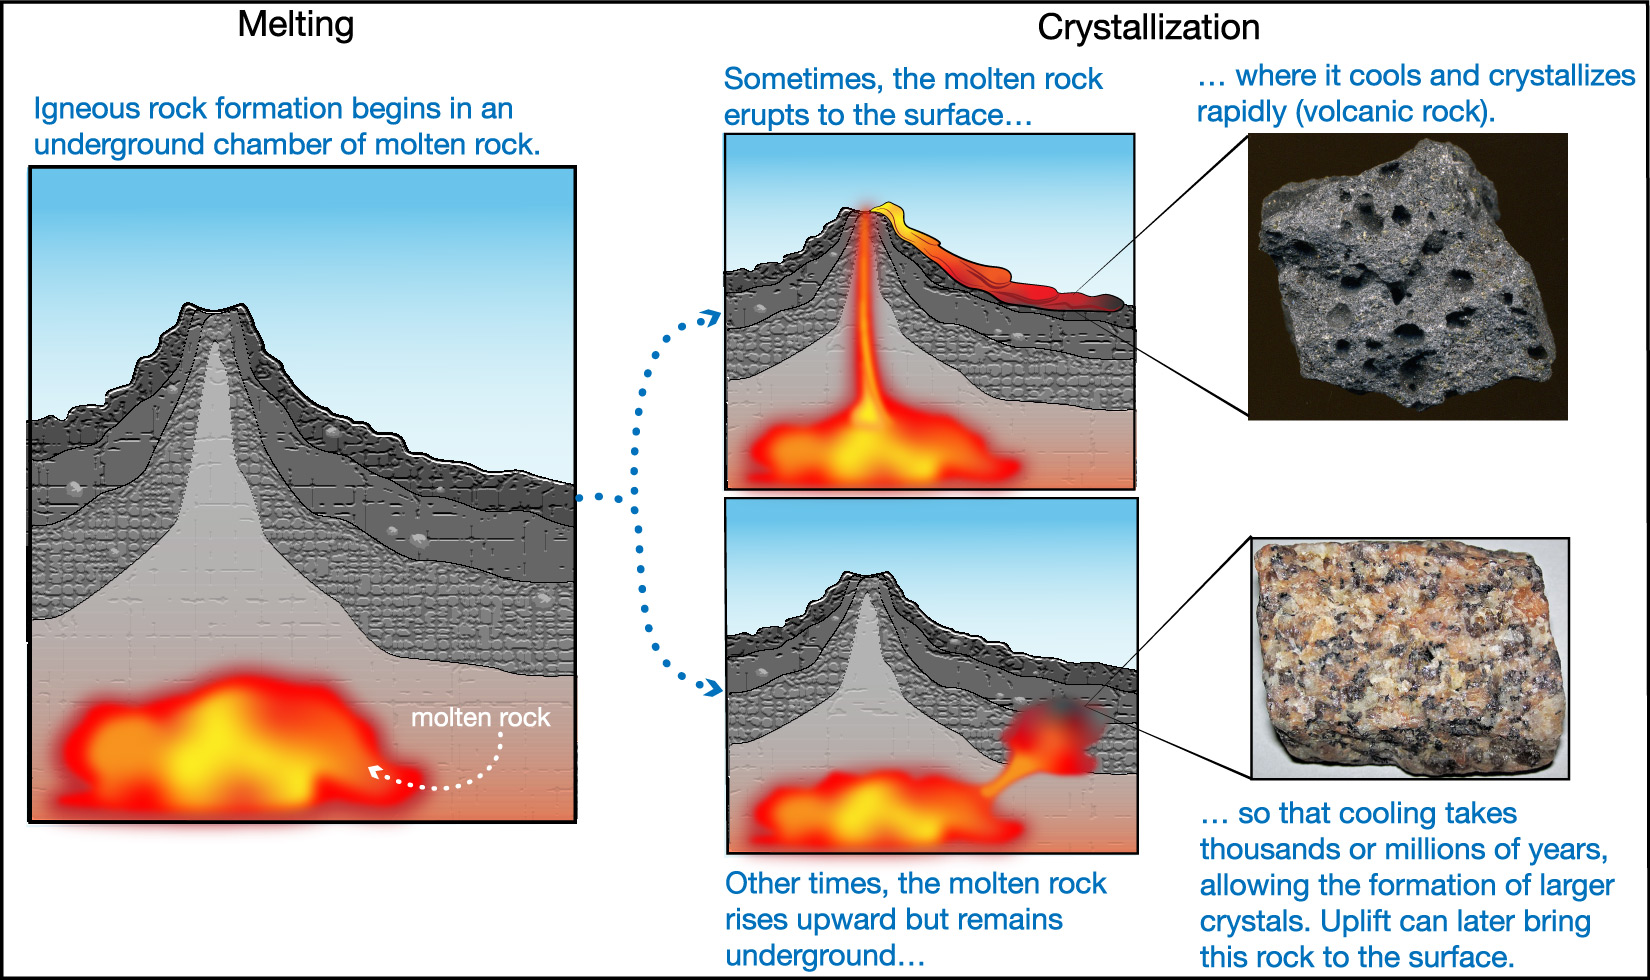
An igneous rock is one that formed when molten rock cooled and solidified. This tells us that the process of making an igneous rock requires only two basic steps:
- The first step is melting: Pre-existing rock within the Earth must melt to become molten rock.
- The second step is crystallization , in which solid mineral crystals form and grow as the molten rock cools and solidifies.
You are probably familiar with the basic idea of crystallization, because it occurs whenever water freezes into ice (Figure 5.1.1–3). As you know, ice formation begins when liquid water cools to a temperature at or below the freezing point (0°C), which means the crystallization of water into ice is just like the crystallization of igneous rock, except that it occurs at much lower temperatures.
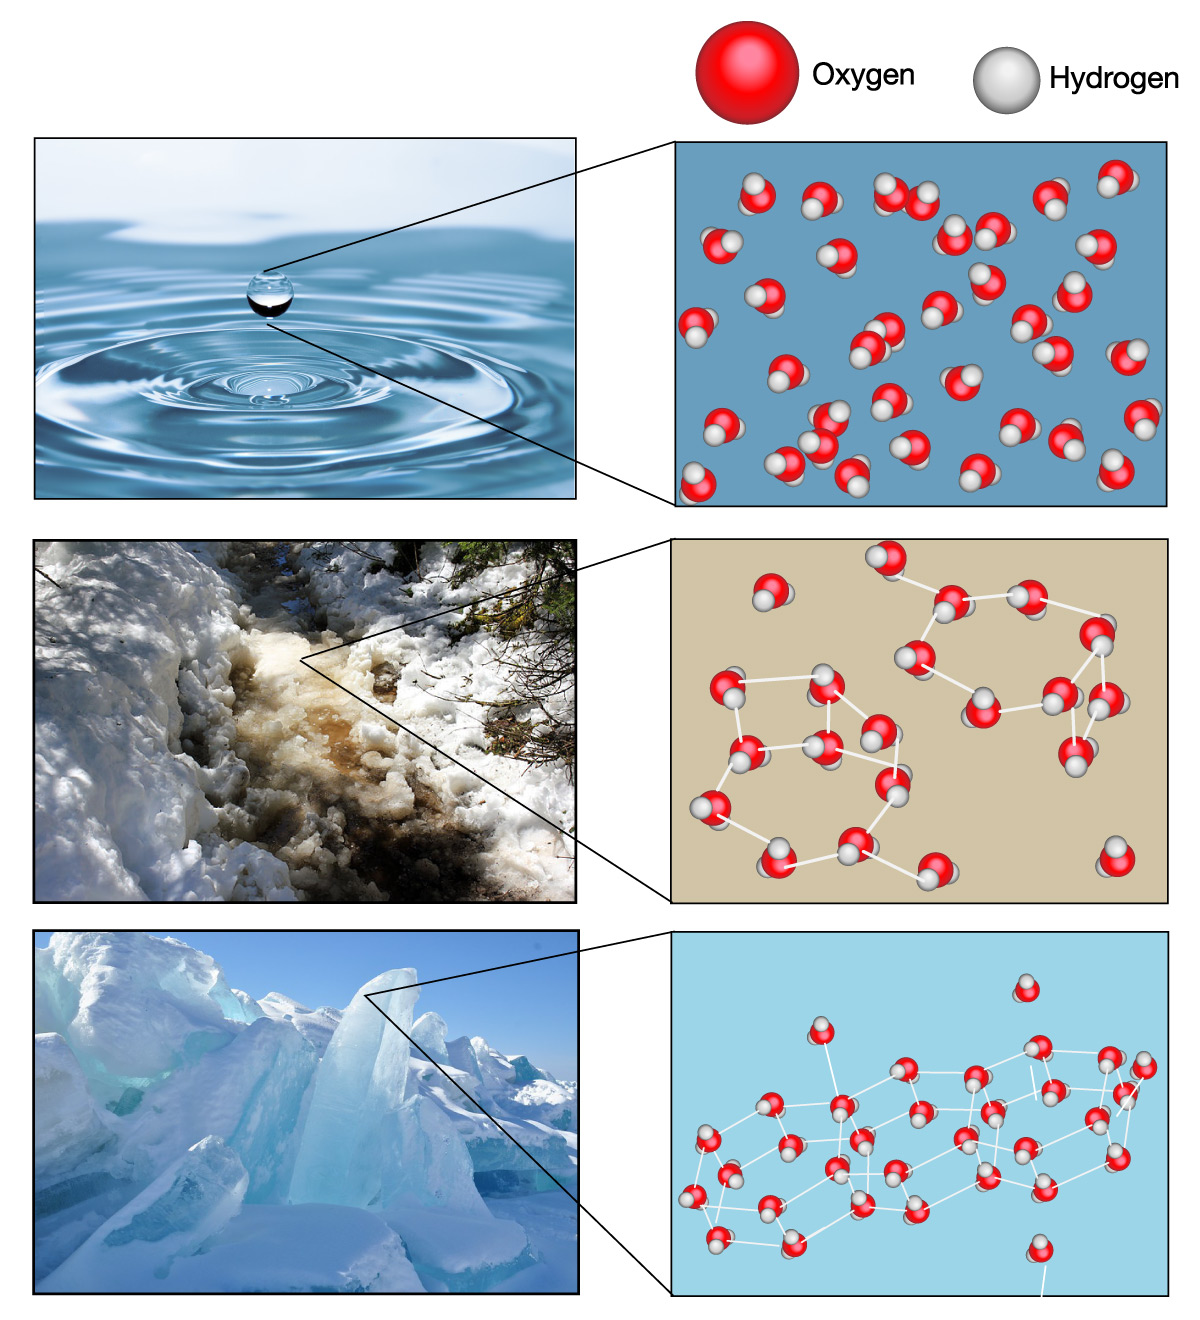
(a) When water is liquid, its molecules can move about relatively freely, which is why liquid water flows so easily.
(b) When temperatures drop to the freezing point, the water molecules begin to arrange themselves in a crystal structure, forming solid ice.
(c) Ice crystals can have many different shapes (think of the infinite variety of snowflake shapes), but on the microscopic level, all have the same basic crystal structure. Ice crystals look different depending on the directions in which an individual crystal grew as more molecules joined into it.
Figure 5.1.1–3 – When we cool water enough, it crystallizes to make ice. In other words, what we usually call “freezing” is actually the process of crystallization. Credit: Yinan Chen, Dan Bruell.
Activity
Growing Crystals
Work in teams of 2 to 3 in this lab activity in which you will grow your own crystals. Safety warning: This activity uses very hot or boiling water that can cause severe burns, so be careful not to splash it or touch the jar containing it when it is hot.
→ If possible, wear safety goggles, gloves, and a thick apron when doing this activity.
Materials:
- table salt, Epsom salt, or sugar
- very hot water (distilled)
- heat-safe bowl/flask
- clear, heat-safe glass jar
- string (yarn or hemp)
- spoon
- pencil, tape
- food coloring (optional)
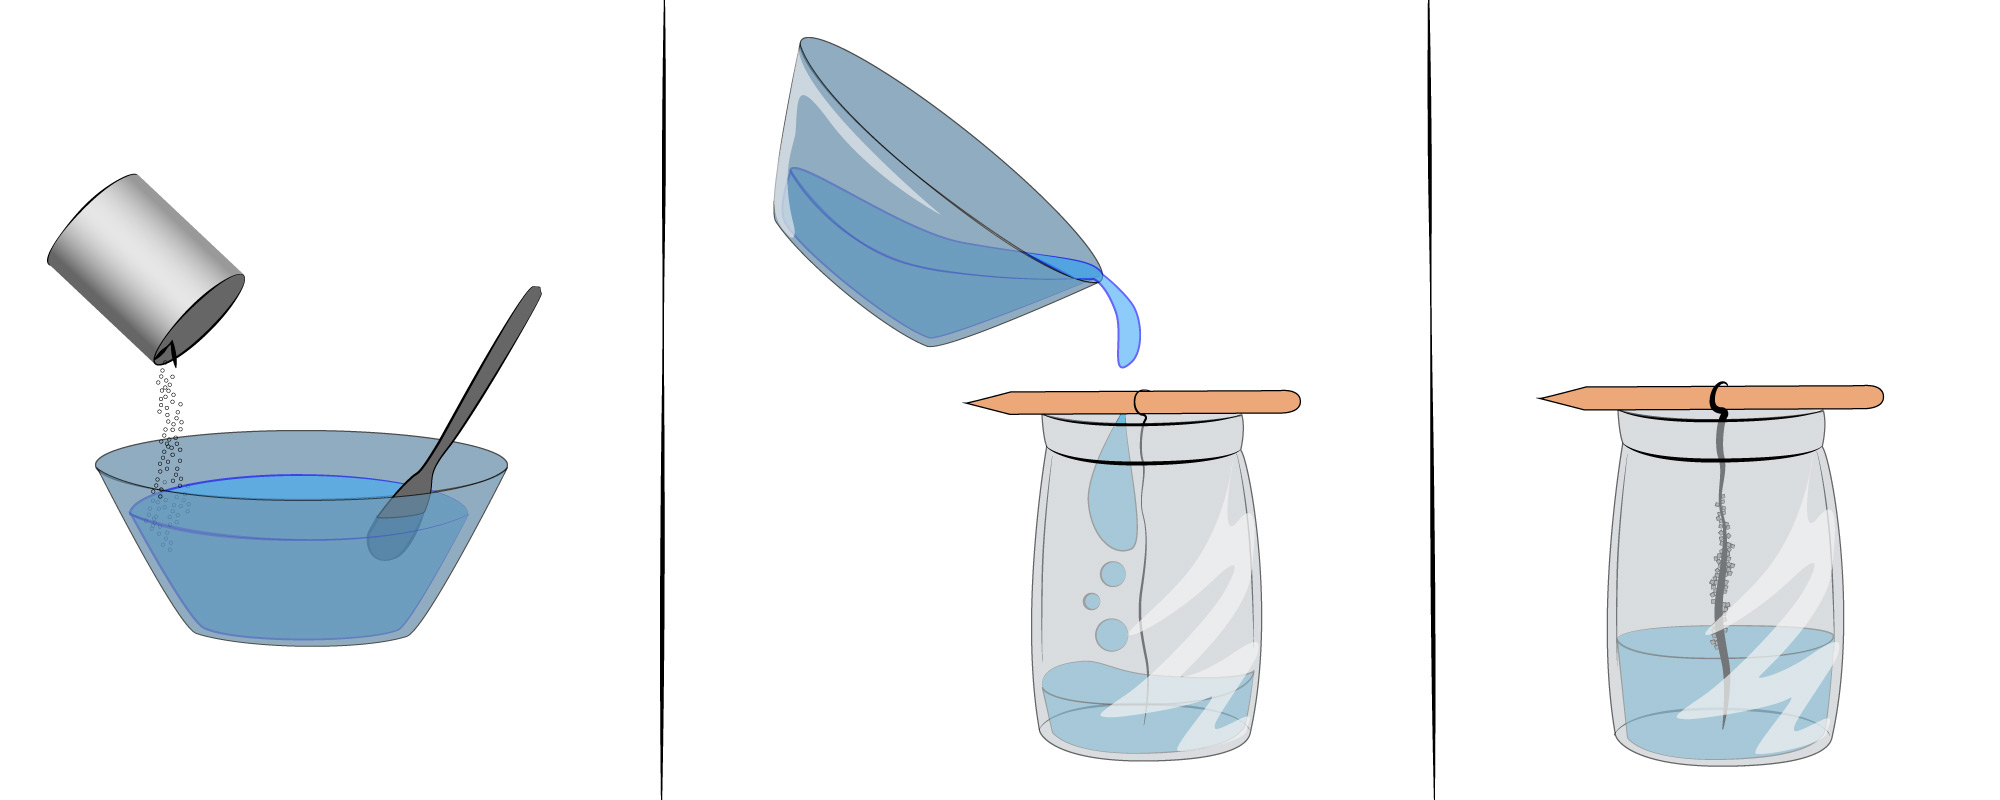
Step 1: Gather your materials.
Step 2: Tie a piece of string to the pencil to hang down into the jar. The goal is to rest the pencil atop the jar, with the string hanging as far down as it can without touching the bottom of the jar. You can re-tie or cut the string if need be. After you prepare the string and pencil, set them aside until Step 5.
Step 3: Your teacher will carefully pour very hot or boiling water into your mixing bowl or flask. Be sure the mixing bowl or flask is heat safe, so it won’t break or melt with the hot water!
Step 4: To make your salt or sugar solution, one team member should begin slowly adding the salt or sugar to the hot water while another team member stirs. WARNING: BE VERY CAREFUL NOT TO SPLASH WHILE STIRRING THE WATER, SINCE IT WILL BE VERY HOT.
→ Continue adding the salt or sugar until you start to see a few crystals beginning to swirl around the bottom of the mixing bowl. This is how you will know you’ve dissolved as much salt or sugar as the water will hold. Note: It will be quite a lot of salt or sugar. For example, 1 cup of boiling water can dissolve as much as about 3 cups of sugar.
→ Optional: Stir in a few drops of food coloring to the water if you want to grow colored crystals.
Step 5: Dip your string into the solution so that the bottom half of the string is wet, then take it out and let it dry. This will help seed the crystal growth.
Step 6: Very carefully (or allow your teacher to do it) pour your salt/sugar solution from the mixing bowl into the heat-safe glass jar.
Step 7: Once the string is dry, rest the pencil on the mouth of the jar, and hang the string down into the saltwater solution. Tape the pencil to the mouth of the jar to keep it from moving.
Step 8: Set the jar aside where it can cool, undisturbed. Then observe as the crystals grow over the next few days.
Use what you learned from the crystal-growing experiment to explain different types of rock and why timescales are important. Questions to ask:
- What is happening that allows crystals to grow?
- How is this similar to how rock forms?
- To start the experiment, you heated water. For the analogous situation with rocks forming, where does this heat come from?
Note: Because the crystals will take a few days to grow, we suggest you have students start this activity in advance of teaching this section, so that the crystals will be ready for students to examine when you reach this point in the text.
This activity involves boiling/very hot water, so be sure to go over safety procedures with your students. We suggest the teacher boils the water and then pours it for every student team.
– Step 1: You can use table salt, Epsom salts, or sugar. Epsom salt crystals tend to start growing within a matter of hours; table salt or sugar may take up to a week. Be sure to use mason jars or other heat-safe glass. CAUTION: Boiling water can shatter regular glass! Using distilled water is helpful, as it will help the crystals grow; impurities in tap water can change the color/shape of the crystals.
– Step 2: The string provides a rough surface on which crystals will grow. The salt or sugar will not attach as well to the smooth glass to start a crystal structure.
– Step 3: We suggest the teacher pours the very hot water.
– Step 4: The goal is to dissolve as much salt or sugar as the water can hold; that is, to make the solution saturated. Students should add the salt or sugar slowly enough that they don’t add too much, but fast enough that the water isn’t cooling much as they work.
– Step 5: The seeding of the string will help the crystal growth.
– Step 6: The water will still likely be very hot when the students transfer it to the crystal growing jar. It is up to your discretion as to whether to do this step for the students or let them complete this step on their own.
– Step 7: Make sure the string is tied tight and the pencil is taped in place, so that the crystals can grow undisturbed.
– Step 7: Ideally there is a surface in your classroom with enough space for each team to set their crystal-growing jar, where it can be left undisturbed. Students should observe the solution and crystal growth each day, if possible.
Questions:
1. The salt or sugar is crystallizing as the water slowly cools.
2. Rock also forms through crystallization, except generally over much longer time scales.
3. Heat from interior of earth (bonus points: heat from radioactive decay).
A bit of background on the science: Hot water can dissolve more salt or sugar than cold water, so as the water cools, the salt or sugar molecules will tend to stick together, forming crystals. As the water continues to cool and evaporate, the crystal growing process accelerates.
Now, see if you can apply what you’ve learned from the examples of ice crystallization and the crystal growth activity to a few questions about the formation of igneous rock.
Discuss the following questions with a classmate. Then click to open the answers to see if they agree with what you came up with.
- Where does rock melting occur?
Melting must occur underground, because there is not enough heat at Earth’s surface to melt rock. When rock melts, it generally forms a subsurface chamber of molten rock, like that you saw previously in Figure 4.18.
- You know that molten rock can erupt as lava from a volcano. Why does this molten rock turn into igneous rock?
Once the lava reaches the surface, it is exposed to the cool temperatures of the surrounding air or water (if it is in a lake or ocean). This causes the lava to cool and solidify fairly quickly , making igneous rock.
- Not all molten rock erupts out of volcanoes. Sometimes, it cools and solidifies to make igneous rock while still underground. How would you expect the time it takes molten rock to cool and solidify underground to compare to the time it takes to cool after eruption on the surface?
Cooling and solidifying underground takes much longer than at the surface. At the surface, cooling is very rapid because of the cool air or water temperatures around the molten rock. Underground, cooling and solidifying often takes thousands or even millions of years as the molten rock slowly rises upward to regions of lower temperature.
- Suppose you find an igneous rock in which you can clearly see large mineral crystals (like those in the granite from slide show 5.1.1–2). Do you think this rock cooled and solidified underground or after eruption from a volcano? Explain how you know.
The answer is underground. Crystal growth takes time (as you will have seen if you did the crystal growth activity above), and volcanic rock cools too quickly to allow large crystals to form. Therefore, rocks that have visible crystals (like granite) must have cooled and solidified underground, so that there was enough time for their mineral crystals to grow to sizes large enough to see by eye.
Figure 5.1.1–4 summarizes the basic processes through which igneous rocks form .
Connections—Etymology
How to Remember What “Igneous” means
The word igneous may sound a bit strange, but it’s easy to remember its meaning if you think about its origins. Notice that the word igneous is very similar to the word ignite. This gives you a clue that both words have a common root, which is the Latin ignis, meaning “fire.” Now, if you remember that fire can be hot enough to cause some materials to melt, you’ll always remember that igneous rocks are rocks that were melted before cooling and solidifying into their current form.
All igneous rocks share the same basic formation process of melting and crystallization, but they can still differ greatly from one another. As you’ve already seen, the cooling rate — which depends on whether the rock solidifies underground or from a lava flow —will affect how crystallization occurs within a particular rock. Other factors that will affect the characteristics of an igneous rock include the chemical composition of the rock that melted to make it (because different chemicals can combine to make different minerals) and the temperatures at which it melted and solidified (because different minerals melt and crystallize at different temperatures).
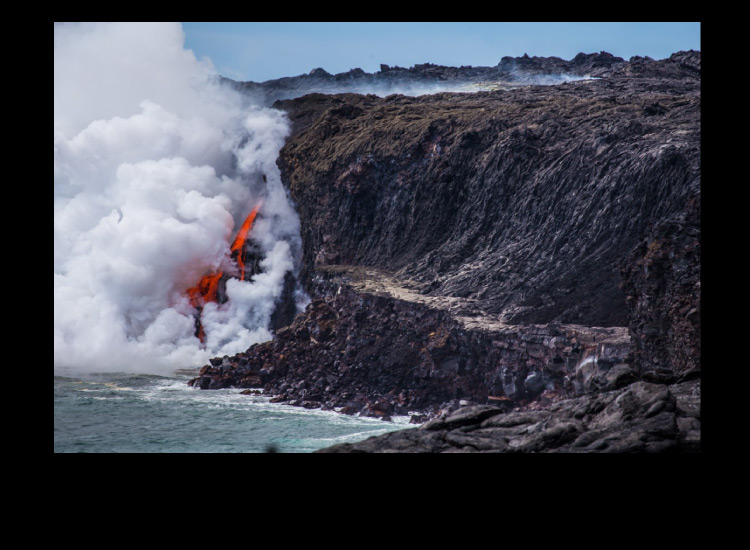
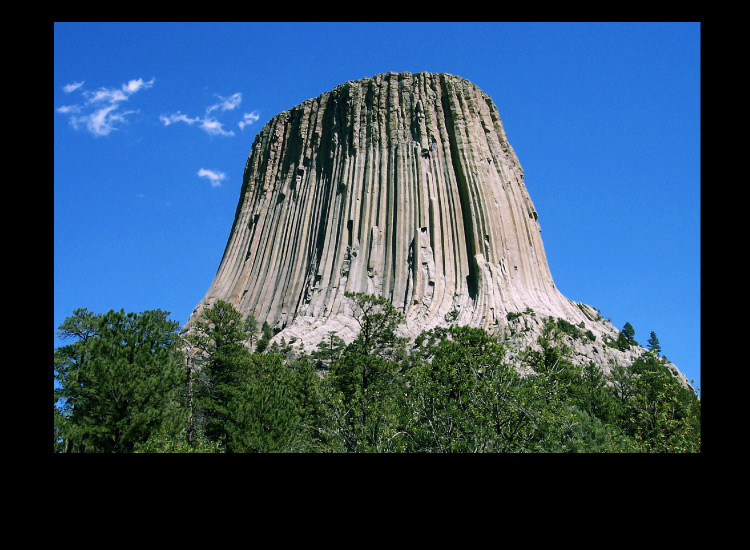
Slide Show 5.1.1–5 shows several famous igneous rock formations. Note that while it’s fairly obvious how igneous rock from volcanic eruptions ended up on Earth’s surface, you might wonder how igneous rock that cooled and solidified underground (such as granite) got to places where we can see it. The answer is what geologists call uplift , in which rocks are pushed upward from where they originally formed. We’ll discuss processes that cause uplift later in the chapter, but you may already recognize that it is very common. For example, uplift also explains how layers of the Grand Canyon that formed beneath the sea ended up at their current high elevations.
Slide show 5.1.1–5 – Take a quick tour of some of the world’s most famous igneous rock formations.
Take It To The Next Level
Identifying Rock Types: Igneous Rock
Coming Soon . . .
Sedimentary Rocks
If you pour sand into a jar of water, the sand will soon settle to the bottom of the jar. This turns the sand into an example of what we call a sediment , which means a material that has settled out in a liquid such as water. In fact, the word sediment comes from a Latin word meaning “settling” or “sinking down.”
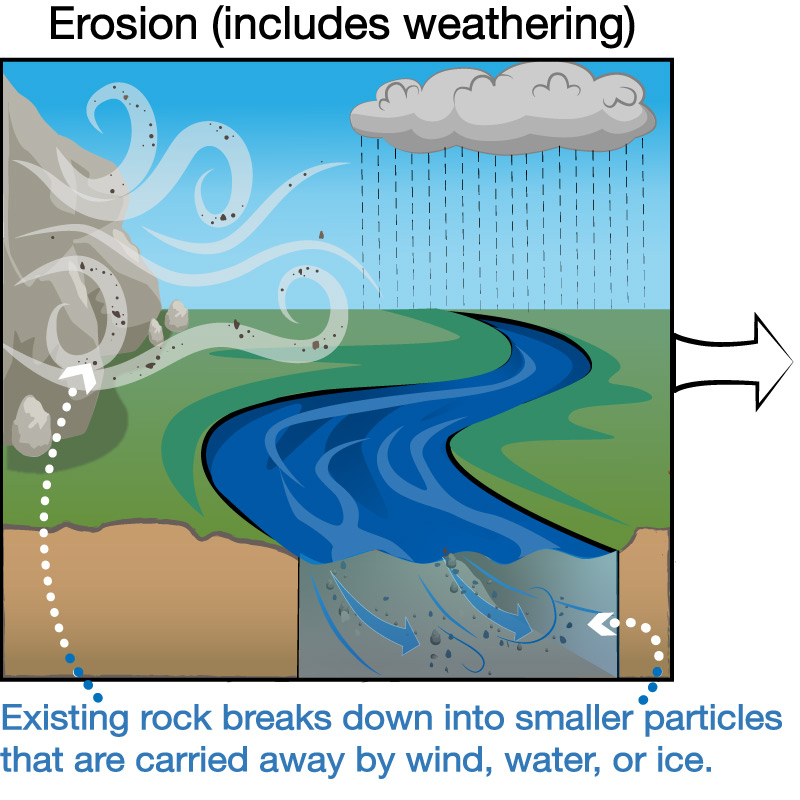
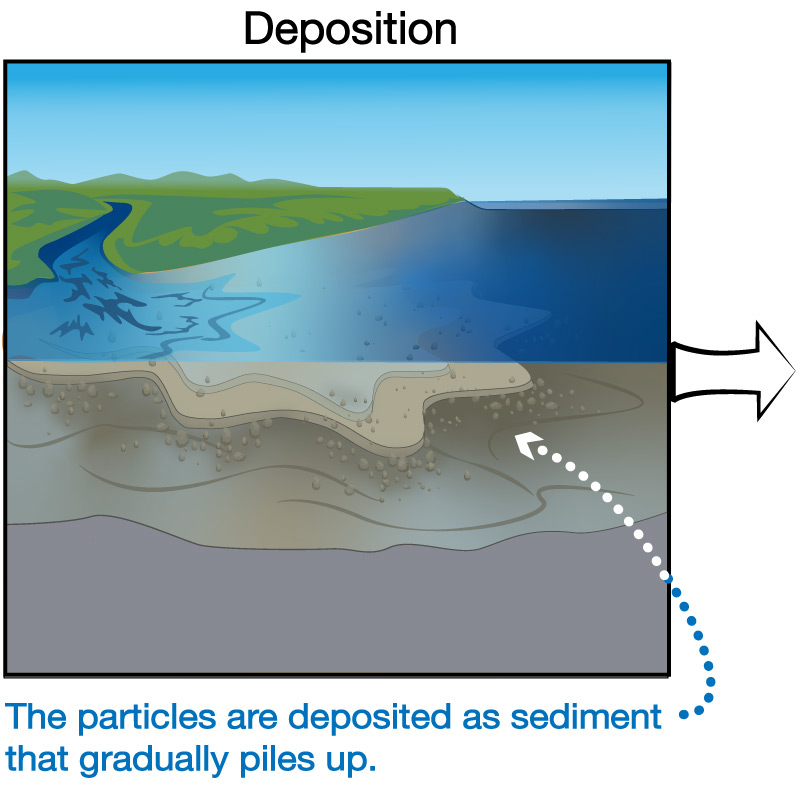
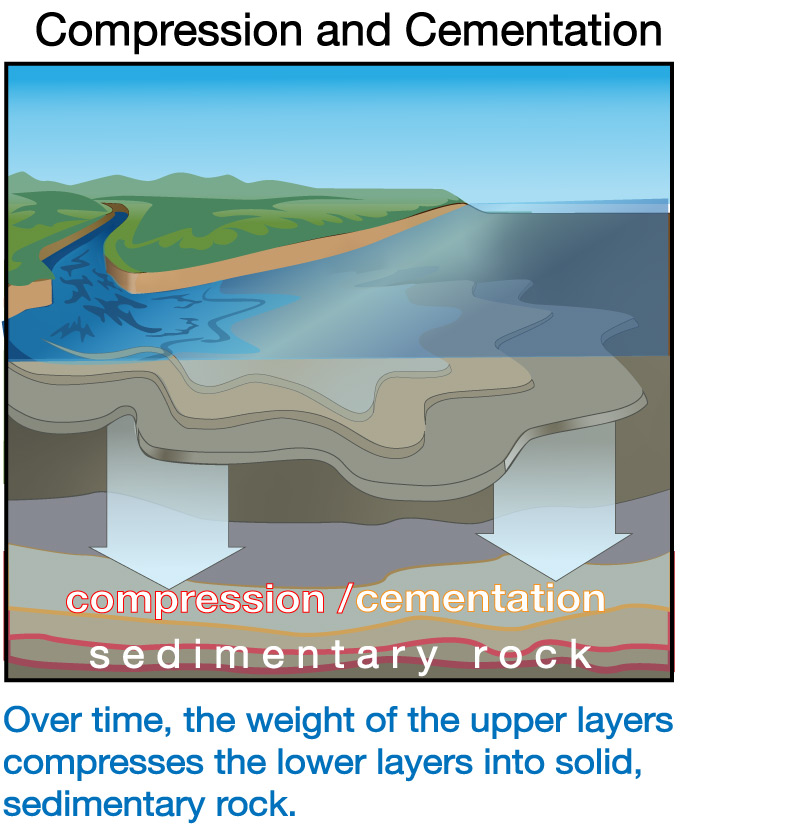
You now know the origin of the term sedimentary rock , which is simply rock that has formed from sediments. If you look again at our rock cycle figure, you’ll see that sedimentary rock formation requires “erosion, deposition, compression.” Let’s look in a little more detail at these three basic steps in the formation of sedimentary rock.
- The first step in forming sedimentary rock requires erosion , in which existing rocks are worn down and their material is then carried away, usually by wind, water, or ice.
Note: A closely related term that you should know is weathering , which refers to the wearing down of rocks or other materials. The subtle difference between weathering and erosion is that weathering is only the wearing down, while erosion includes the transport to a new location. For example, you might hear someone say that they need to repaint their house because the old paint has been broken down by weathering. - In order to become part of a sedimentary rock, the eroded material must settle down somewhere as sediment, so that more sediment can pile on top of it. This settling and piling usually occurs in water such as in a stream, lake, or sea, but it can also be driven by wind (such as in sand dunes) or the gradual movement of glaciers . The processes by which sediments settle down can be called either deposition (because the sediments are deposited in their new location) or sedimentation (from the fact that the word sediment literally means material that has settled).
- The final step is to turn the pile of sediments into solid rock. This requires compression of the sediments by the weight of other sediments or rock above them , so that they become pushed close enough together to make them stick to each other (since otherwise they’d still be separate sediments, like loose sand, instead of a solid rock). This “sticking together” part of the process is often called cementation , because it is similar to the process of making cement. Just as when a construction worker pours cement for a floor or sidewalk, cementation typically happens as water helps to crystallize minerals that can hold together adjoining bits of sediment.
Figure 5.1.1–6 summarizes the basic processes that form sedimentary rock.
Figure 5.1.1–6 – This figure summarizes how sedimentary rock forms in water, but these layers can also be laid down by wind.Credit: Zofostro Science.
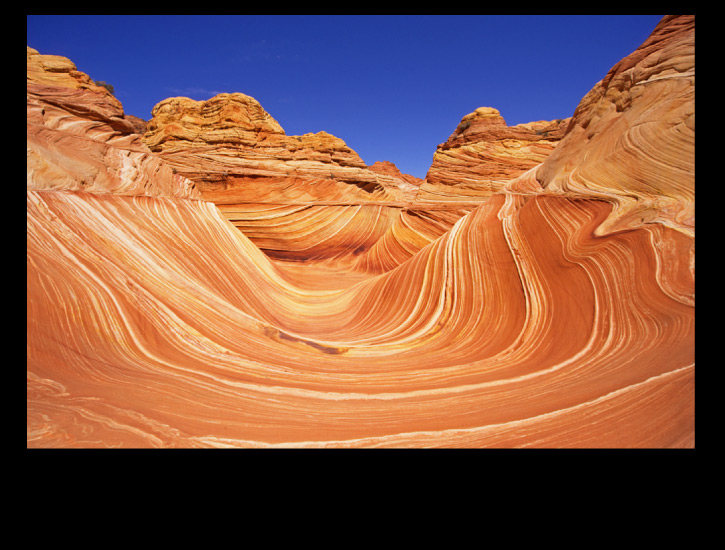
The fact that sediments pile up over time explains why they are typically found in layers like those in the walls of the Grand Canyon. These layers are often called strata , which is just a fancy but common synonym for “layers.” So if you hear teachers or scientists talk about the “rock strata” of the Grand Canyon, you’ll know they just mean the rock layers that we see there .
Sedimentary rocks differ from one another depending on the type of material that made the sediments from which they form. Geologists often describe sedimentary rocks based upon the grain sizes of the sediments. For example, sandstone is a sedimentary rock made up of sand-sized grains that are now all cemented together, while mudstone is made up of the smaller particles that constitute “mud.” Another very common sedimentary rock is limestone, which is made almost entirely of the remains of sea shells and corals that piled up as sediments on the ocean floor . Slide Show 5.1.1–7 shows several famous sedimentary rock formations.
Slide show 5.1.1–7 – Take a quick tour of some of the world’s most famous sedimentary rock formations.
Activity
Local Strata
As a class, discuss if and where you can see exposed sedimentary strata (layers) near your school or in your region. If possible, take pictures of these rock formations. Then discuss which layers are likely to be the oldest and youngest. Can you learn anything more about the origins of these local strata? (Hint: good places to look for sedimentary strata include canyons and places where rock has been cut to make way for a road.)
This is an open-ended activity designed to have students think about sedimentary strata that they may see on a fairly frequent basis because of their proximity. If you can find information on the origins of these rocks, you should prepare that in advance so you can discuss it with your students.
Take It To The Next Level
Identifying Rock Types: Sedimentary Rock
Coming Soon.
Metamorphic Rocks
You can begin to make sense of the third major category of rock, metamorphic, by noticing that its name is very similar to the word metamorphosis, which is used to describe a caterpillar changing into a butterfly (Figure 5.1.1–8). Both words include two roots that go back to Latin and Greek: meta, which means “changed,” and morph, which means “form” or “shape.” In other words, when we say that a caterpillar undergoes metamorphosis to become a butterfly, we are simply saying that it becomes changed in its form.

In a similar way, a metamorphic rock is a rock that has undergone a change in form , but not of composition. The change in form must be very significant to count as metamorphic, but not so significant as to completely melt or destroy the original rock. Metamorphic rocks are therefore sometimes said to have undergone deformation , because they still have the same composition but now look deformed compared to their original shapes or mineral structures.
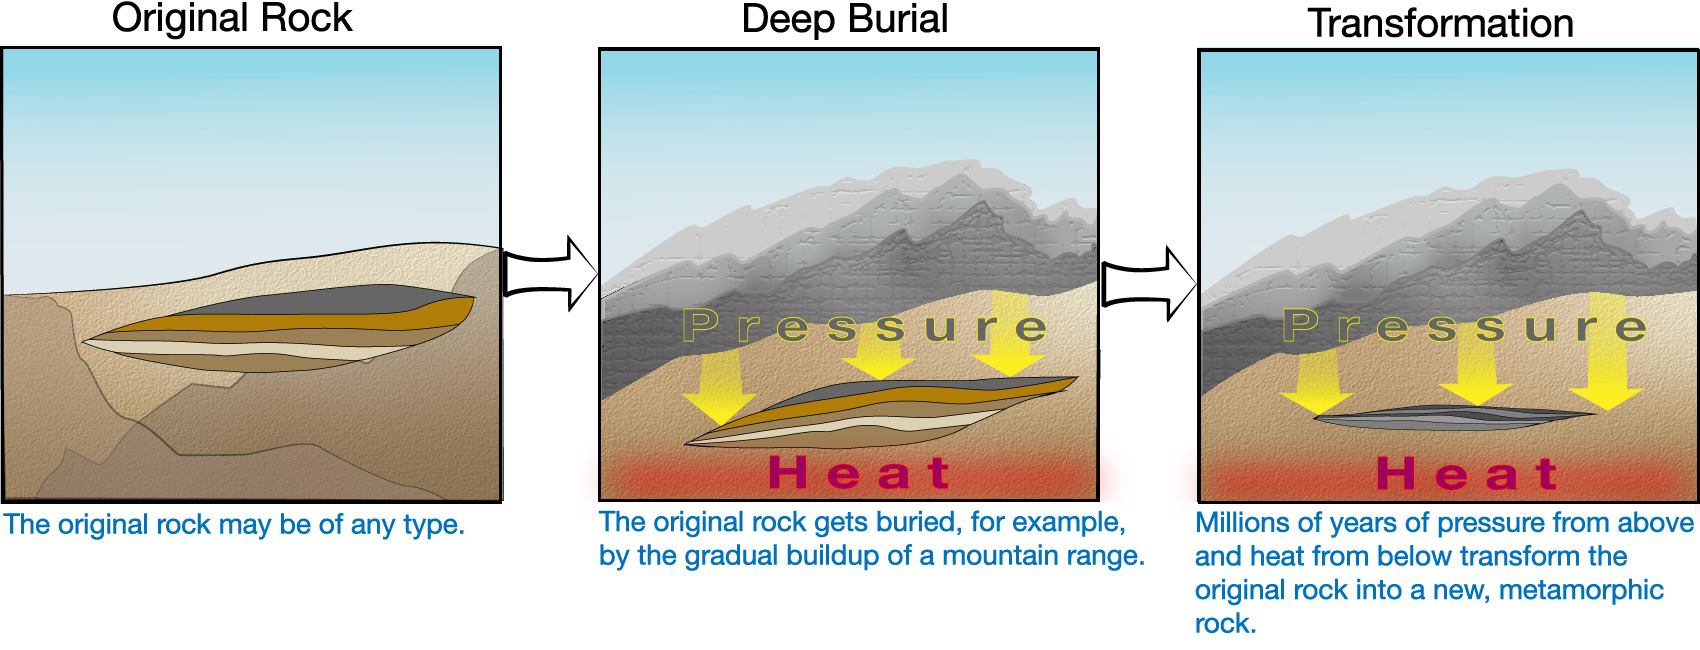
It’s not easy to deform a rock. In general, deformation requires some combination of high heat and high pressure, which means it almost always occurs deep underground. This heat and pressure must be applied for a very long time— typically for millions of years — to alter the rock. This tells us the basic process by which most metamorphic rocks are formed:
- First, an existing rock (of any type) becomes buried underground. This can happen, for example, if a mountain range builds up over the place where the original rock was located, or because the rock is carried downward as one tectonic plate slides under another.
- Then, over millions of years, heat and pressure transforms the old rock (without melting it) so much that its mineral arrangement is significantly changed (but its composition remains the same), making it a new rock.
Figure 5.1.1–9 summarizes the basic process by which metamorphic rocks are made, and Slide show 5.1.1–10 shows examples of metamorphic rock formations.
Slide show 5.1.1–10 – Take a quick tour of some of the world’s most striking metamorphic rock formations.
Journal Entry
Rock Remembrance
Make a brief journal entry in which, in your own words, you write down a simple way that you can remember the meaning of and distinction between the three major categories of rock: igneous, sedimentary, and metamorphic.
This brief journal entry is designed to address the fact that even after all the discussions and learning above, the basic terminology of rocks probably still sounds strange to most students. We therefore ask them to write down something that will help them remember. Note that it is perfectly fine if they simply repeat the etymological tricks we’ve already provided (such as relating igneous to ignite). However, some students may come up with their own clever ways to keep track of the terms.
Take It To The Next Level
Identifying Rock Types: Metamorphic Rock
Coming Soon
The Rock Cycle Revisited
Let’s look once more at our figure of the rock cycle, now that you have learned a little more about the three major rock types. The arrows indicating the different ways in which rocks can change between these types should now make more sense.

Try the following quiz to make sure that you understand the major ideas of the rock cycle. After you complete the quiz, do the group discussion and the activities that follow to help further strengthen your understanding of the rock cycle and its importance to our planet.
Quiz
Note: As always, after you finish the quiz, be sure you read the feedback that explains the correct answers, to make sure you understand the reasons for these answers.
Group Discussion
The Rock Cycle in Context
Working in small groups or as a class, discuss the following questions that consider the rock cycle in the context of time and the history of our planet.
-
- Suppose you had a time machine and could visit Earth just after it formed about 4½ billion years ago. What type(s) of rock would you have found on its surface, and why?
- Earth probably had some type of “rock cycle” from the time it finished forming, since there were almost certainly volcanoes even at very early times. However, this early “rock cycle” probably did not have all three types of rock that we see today. Which rock type could not have existed on the very early Earth, and what had to happen on our planet before a rock cycle like we observe today could get underway?
- Refer to the list of six processes of the rock cycle from the above quiz, repeated here:
- A. melting existing rock into molten rock
- B. changing the nature of an existing rock with heat and pressure
- C. wearing down an existing rock through weathering or erosion
- D. piling up of sediments through deposition (or sedimentation)
- E. compression of sediments into sedimentary rock
- F. crystallization of minerals
Which of these processes can occur in the shortest amounts of time? Do they always occur in those short times, or do they sometimes take much longer?
- Consider a rock of any type (igneous, sedimentary, or metamorphic) that is now on Earth’s surface. If its transformation into a different type of rock happened as fast as possible, would that mean (a) a few years, (b) thousands of years, (c) millions of years, or (d) billions of years? Explain why.
- Think again about the rocks that you could have found on Earth’s surface if you had visited just after it formed (as in question 1 above). Do you think it is likely or unlikely that some of those rocks still exist on Earth’s surface? Explain why.
Before you start this discussion, we recommend that students have already completed the above quiz successfully, to ensure that they are understanding the key ideas of the rock cycle. This discussion then builds additional context, relating the rock cycle back to ideas of time, energy, and Earth’s history that we discussed in Chapter 4. Notes on the answers:
- When Earth first formed, its surface would have been made entirely of igneous rock. To understand why, students should recall that, during its formation, Earth’s entire interior must have entirely melted in order to explain the core-mantle-crust structure. This means that all surface rock must have been rock that cooled from being molten, which means it was igneous.
- The early Earth could not have had sedimentary rocks, because sedimentation generally requires water (such as lakes or seas) in which sediments can settle. Therefore, the crucial event in making the current rock cycle possible was the formation of Earth’s oceans.
Note 1: Scientists still debate exactly when Earth first got its oceans, but it was almost certainly before 4 billion years ago, and perhaps as long as 4.3 to 4.4 billion years ago.
Note 2: To a lesser extent, the current rock cycle also depends on plate tectonics, since that plays a crucial role both in carrying rocks down underground and in uplifting them to the surface. No one knows for sure when plate tectonics first began on Earth. - The processes in the rock cycle that can happen in relatively short times are weathering/erosion (C) and crystallization (F). For example, a single event like a storm or flood can cause substantial weathering, while crystallization occurs rapidly after molten rock erupts to the surface, and can also occur rapidly in water (such as in the activity in which students made salt crystals). However, these processes don’t always happen quickly. For example, the weathering and erosion that gradually cuts down a mountain range can require many millions of years, and the crystallization that occurs in igneous rocks that form underground (intrusive igneous rock) can also take millions of years.
- The answer is (c), millions of years. The reason is that no matter what transformation is occurring, some of the steps in the rock cycle will require a long period of time. For example, to turn an existing surface rock into a new igneous rock requires that it be transported by plate tectonics deep underground, where temperatures are high enough for it to melt, and this transport occurs over millions of years. Similar transport to great depth is required to turn an existing surface rock into a new metamorphic rock. For sedimentary rock, the sediments generally build up over millions of years, and also require millions of years to be compressed into new solid rock.
- It is extremely unlikely that any of Earth’s earliest rocks still exist on the surface, for the simple reason that by now, all of them have almost certainly undergone transformation through the rock cycle. Note: This question can be used to spur further discussion in preparation for the topic of the ages of rocks in Section 5.1.3. In particular, students should recognize that the ongoing rock cycle means that very old rocks will be rarer than younger ones, because older means more time and opportunity to have undergone transformation.
Claim-Evidence-Reasoning Activity
Sedimentary Mars
Most of Mars’s surface is covered by igneous rock that appears to be volcanic in origin. However, in a few regions, Mars has rocks that clearly appear to be sedimentary. NASA’s Curiosity rover was sent to explore one such region, which is on the inside of an impact crater known as Gale Crater. Take a look at the following slide show of images from the Curiosity rover.
Based on your study of the images and what you know about sedimentary rock, use evidence and reasoning to support the following claim:
Claim:The presence of sedimentary rock in Mars’s Gale Crater provides strong evidence that the crater once contained a lake of water.
After you’ve supported the claim, briefly use what you learned about Mars in Chapter 4 to come up with a general history of how you think the region being explored by the Curiosity rover came to look as it does today.
This CER activity is included both to check that students understand how the presence of sedimentary rock suggests rock that formed in water and to introduce students to some of the incredible evidence that has been collected on Mars through scientific study. For this reason, we urge you to have students spend at least a bit of time discussing the slide show images before getting to the main claim. Notes:
- Supporting the claim itself should be fairly straightforward: The photos show layered structures indicative of sedimentary rock, and students already know that sedimentary rock formation generally requires water.
- Note for your background and in case questions come up: Appearances by themselves are not enough to fully establish that the rocks formed in water as opposed to, say, having been deposited by wind. However, recent rovers (including Curiosity) have also had instruments that can do chemical analysis. This analysis has confirmed the presence of minerals that scientists think can be formed only in the presence of water.
- For the general history: Students should recall that scientists think that Mars once had widespread liquid water, but that all this dried up at least 3 or so billion years ago. For Gale Crater, they should therefore be able to put together the following sequence of events:
- At some point in the very distant past (well over 3 billion years ago, and probably closer to 4 billion years ago), Gale Crater formed when an asteroid or comet crashed into Mars’s surface.
- During the time when Mars was wet (still over 3 billion years ago), rainfall filled the crater with water, turning it into a lake.
- While it was still a lake, sediments piled up on the lake floor. (Some of the sediments were probably deposited as windblown debris and some were probably carried downward from the crater walls by streams or rock slides.)
- The weight of the sediments compressed them into solid rock.
- Then, when Mars dried up, the sedimentary rocks were left exposed.
- They have probably undergone very little change since that time, except for sculpting by wind.
Reading the History of a Rock
Identifying a rock as igneous, sedimentary, or metamorphic gives us a basic picture of how a rock formed. The details of any rock can tell us far more. We’ve already seen a few examples of these details. For example, the sizes of mineral grains in igneous rocks tell us whether they crystallized underground or after a volcanic eruption at the surface, and sedimentary rocks can tell us that they formed at a time when their location was underwater.
Geologists have learned to read much more through detailed examination of a rock’s structure and content. For example, the precise mineral composition and arrangement in a rock can tell us the temperature and pressure that the rock was exposed to as it formed. In this way, geologists can learn how far underground a rock once resided. To understand this idea, consider two well-known minerals that are both made of nearly pure carbon: graphite and diamond (Figure 5.1.1–11). The crystal structure of graphite can form fairly easily, which is why graphite is common. Note that its structure also makes graphite very soft for a mineral, which is why it used in pencils. In contrast, the very hard crystal structure of diamond can form only under great pressure, telling scientists that diamonds must form at least 150 kilometers underground. This means that diamonds are made in the mantle, well below Earth’s crust. This, in turn, explains why diamonds are rare and valuable: Their formation at great depth means they are rarely uplifted all the way to the surface.
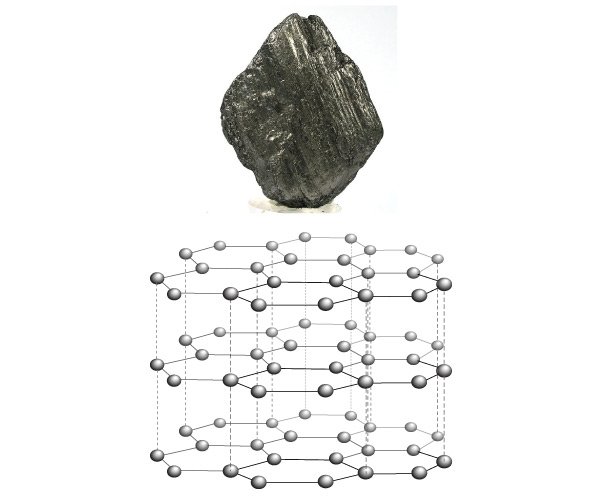
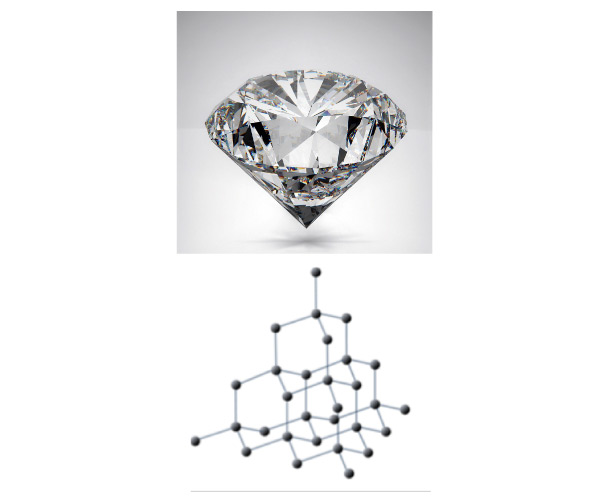
Figure 5.1.1–11 – Graphite and diamond are both made of nearly pure carbon, but their crystal structures have different arrangements of the carbon atoms. Diagram credit: Steve Earle, from Physical Geology – Second Edition (Victoria, B.C.: BCcampus, /opentextbc.ca/physicalgeology2ed/).
Activity
Rock Presentation
Working individually or in small groups, choose one rock formation from around the world that you think is particularly interesting or beautiful. You can choose any of the formations shown in the slide shows 5.1.1–5, 5.1.1–7, or 5.1.1–10, or you can choose some other formation that you find by searching the web. Once you’ve chosen your formation, do some online research to:
- Find additional photos showing different views of the formation.
- Learn the types of rocks that are seen in it.
- Learn what is known — and what is still mysterious — about its geological history.
- Learn if the rock has any cultural significance, and if so what that significance is.
After completing your research, prepare either a poster or an electronic presentation about it for the rest of your class.
This activity is designed to have students look into depth at one famous rock formation from around the world. We have suggested that students make either a poster presentation or an electronic (e.g., PowerPoint) presentation of their findings. You may wish to direct them in terms of which of these you prefer. Notes:
- If you want to avoid competition and get greater variety in the projects, you may wish to make sure that no two students or groups choose the same rock formation.
- If students choose a formation from one of the slide shows in this section, then the research should be relatively easy because they’ll have the name and location to look up. However, if they do their own search, note that while searches on terms like “famous rock formations” will turn up many beautiful photos, most of these won’t provide enough information to allow for the necessary research. You may therefore need to help direct your students to find formations about which the needed information is readily available.
- Encourage students to get as detailed as possible in explaining how various clues found in the rock lead to understanding of its geology.
